Gluten Free Breakfast
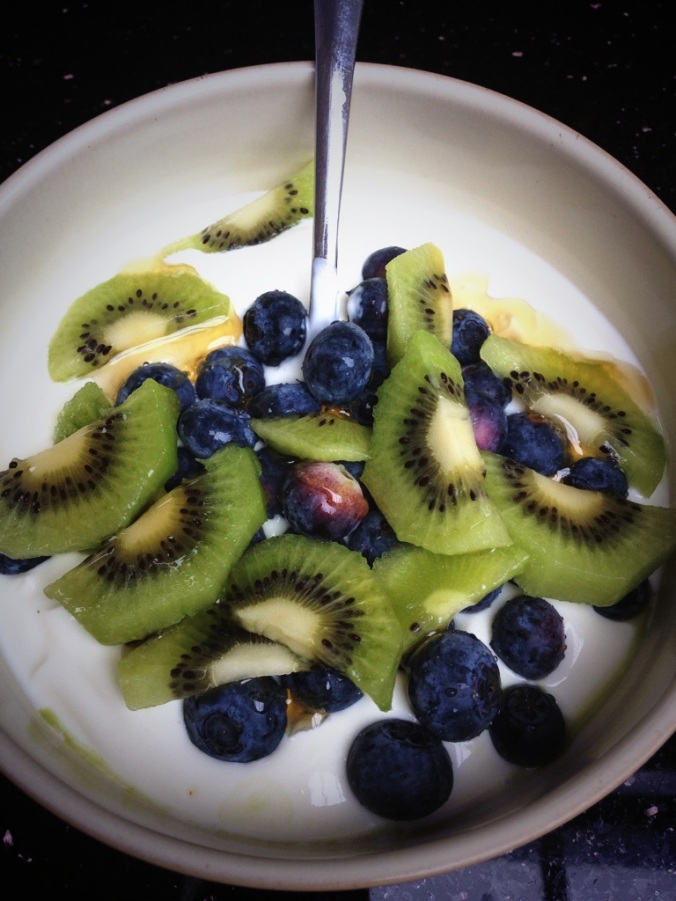
I regularly go to the gym and do interval training which is a mixture of cardio and weights. My favourite post gym breakfast is Greek Yoghurt with fruit and a squirt of honey or agave syrup. Agave Syrup is a naturally sweet product that doesn’t spike your insulin and is low GI
Greek yoghurt has a higher protein content and this means, to me, that I stay fuller for longer. I never bore of this breakfast as you can add so many different sorts of fruit.
There is currently a precautionary boil notice on frozen berries in Ireland, so if you are using those, ensure you adhere. This doesn’t have to impact the flavour. I put them in a pan with only a tablespoon of water. If I use frozen blueberries, a nice pinch of cinnamon adds good flavour.
Of course I eat other breakfasts. Keep an eye out for homemade gluten free granola and cooked breakfasts. Recipes coming soon.
Gluten Free Meatballs and Spaghetti
Meatballs and spaghetti are a firm family favourite. It’s easy to make the meatballs and sauce gluten free and as I am the only coeliac in my house, I just use two separate pots for the spaghetti. Always be careful not to cross contaminate your gluten free spaghetti. I keep utensils apart and obviously drain your gluten free spaghetti first so the colander isn’t contaminated. This recipe takes around 20 minutes to prepare and 45 minutes to cook. Can easily be done the day before. I sometimes buy a packet of lamb mince and mix it through the beef and this keeps the meatballs softer.
Ingredients – Serves 4
- 1 packet of mince
- gluten free thyme, oregano and basil. Goodalls herbs are GF
- 1-2 cloves of garlic – or to taste
- 1.5 table spoons of tomato concentrate
- 1 Pepper
- 2 stalks of celery (optional)
- 1 bay leaf
- 1 tin of chopped tomatoes
- 350 ml of beef or veg stock – I use Knorr gluten free stock pots.
- Spaghetti – 100g per person.
In a mixing bowl add the herbs, with a pinch salt and pepper to the mince. Mix this through and then start making the meatballs. I do this by hand. Fry the meatballs in a medium to hot pan with some oil. Once they are on the pan, don’t move them until they have browned on one side and they won’t stick to the pan then.
Once they have browned, remove them from the pan. Add your chopped celery, peppers, tomato concentrate, garlic and fry off until they are starting to soften.
Add the meatballs back into the pan along with the Tinned tomatoes and stock. Cook with the lid on until the sauce has thickened. Cook the spaghetti and serve.
I used Lidl own brand Spaghetti.
I was also so hungry, I forgot to take a picture of my served dish. Next time!
Gluten Free Thai Red Curry
Gluten Free Thai Red curry is one of my favourite meals. I cook a Thai curry, Red or Green, at least once a fortnight. I do a lot of my shopping in Lidl Ireland so many of the ingredients can be found there. I use a local butchers for my meat. To make the paste, you will need a hand blender to blitz the ingredients. I roast chicken breast on the bone as it’s more tender to add it in closer to the end of cooking. I buy four of these for €7 in my butchers.
Ingredients for 3-4 people
For the Paste
- One Lemon Grass Stalk – white bits. Peel tough outer tusk and roughly chop. 2cm of Ginger – peeled and roughly cut
- 2-3 Cloves of Garlic – peeled
- 2 Red Chilli’s. I love a hot curry and leave the seeds in. Remove seeds and reduce to one chilli for milder version.
- Zest and Juice of one Lime
- Table spoon of Nam Pla – most varieties are gluten free
- 2 tablespoons of olive oil
- Gluten Free Ground Coriander
- Gluten Free Cumin
- Tomato Paste
- 1 Large Tomato
- 1 Cinnamon Stick
- 1 Red Pepper (optional)
- 1 Tin of Coconut Milk
- Rice to serve – 70g per person
- I’m addicted to broccoli.
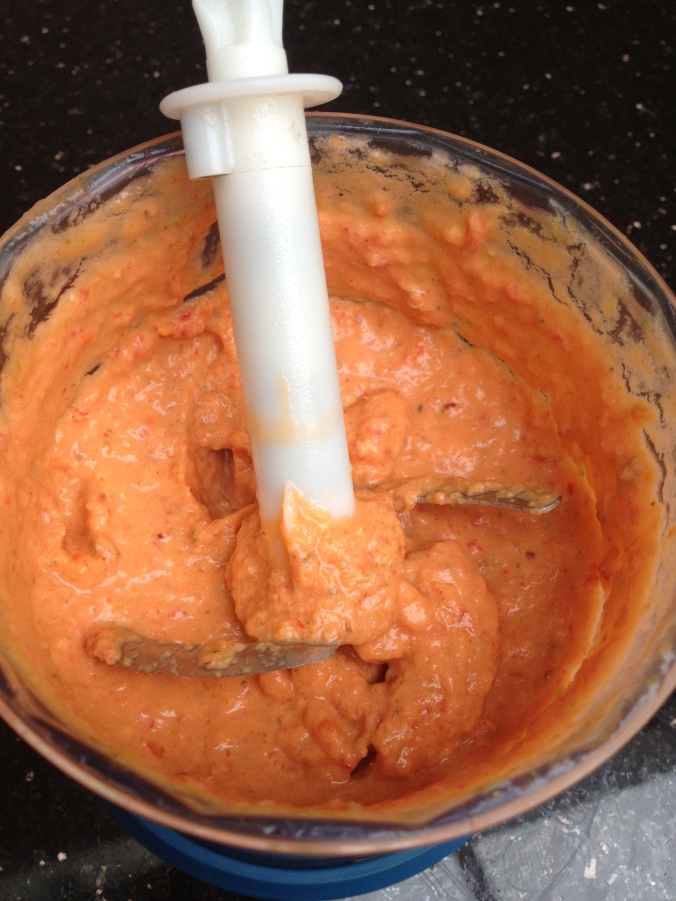
Put the lemongrass, chilli, garlic, lime juice and rind in and this stage I blitz the paste to get a good base.
For the red paste, you can add about a dessert spoon of tomato concentrate (optional) and a large fresh tomato, a generous teaspoon of gluten free ground coriander and also a teaspoon of gluten free cumin. I then blitz the whole mixture together with a small pinch of sugar.
Transfer into a pan and cook with about 5cm of cinnamon stick out slowly for about 8-10 minutes. I don’t put it on a high heat to start as burnt garlic in a dish can cause a bitterness that destroys the whole dish.
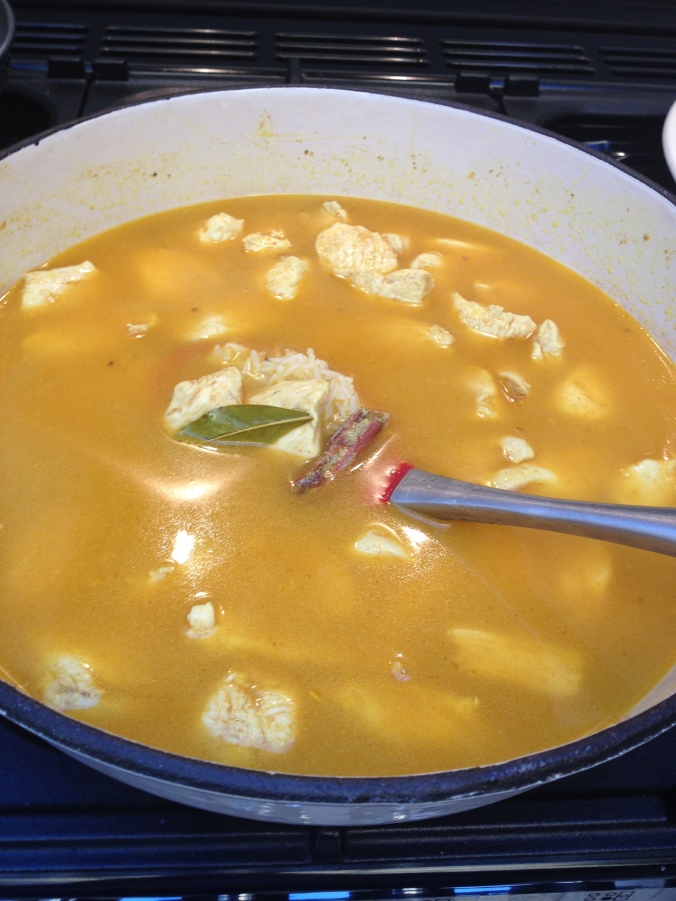
Once this has cooked out I add in the chopped pepper and one tin of coconut milk, plus another half tin of water. Once this has been brought to the boil and simmered for 10 minutes, you can chop your pre-roasted chicken. If you are using chicken breasts, add them after you’ve put in the coconut milk and they still remain soft. At this stage, plan your rice and accompanying veg.
Once the curry has simmered for a while and the consistency becomes thicker, your curry is almost ready. If using raw chicken in the recipe, ensure it’s cooked through.
When your curry, rice and veg are all cooked, you’re ready to serve and enjoy your Gluten Free Thai Red Curry. Enjoy
I don’t know about you, but I ALWAYS cook up to two portions extra. Leftovers during the week for a fast re-heat are just the business. Why start from scratch, when you did that last night? Re-create.
Gulten Free Roast Salmon with Crushed Peas
It’s a beautiful Spring day in Dublin, definitely one of our warmest this year. The temperature on my car was hitting 17 degrees centrigade, which is a blessing so early on in April.
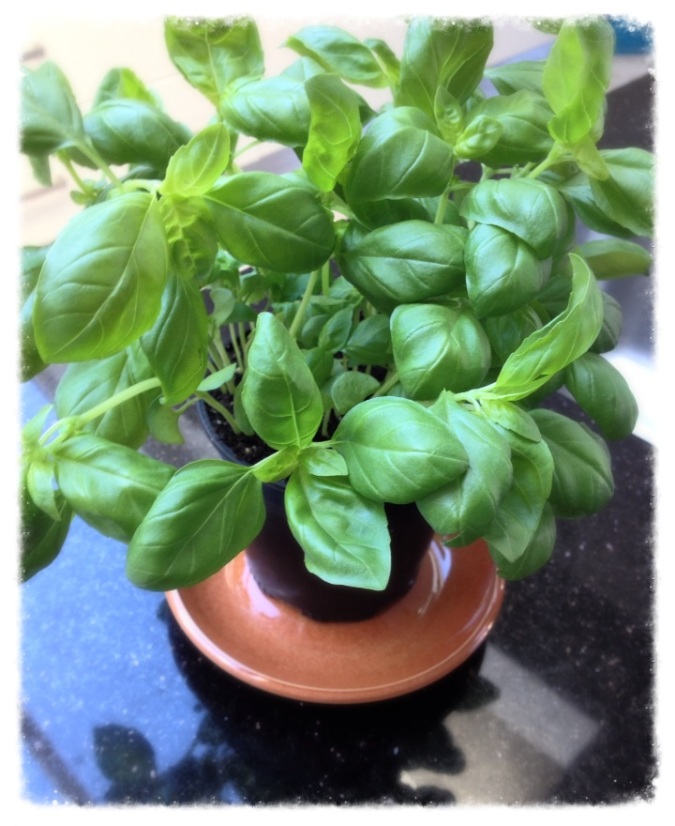
My inspiration for my dinner tonight, was a simple one. I was shopping this morning and spotted this:
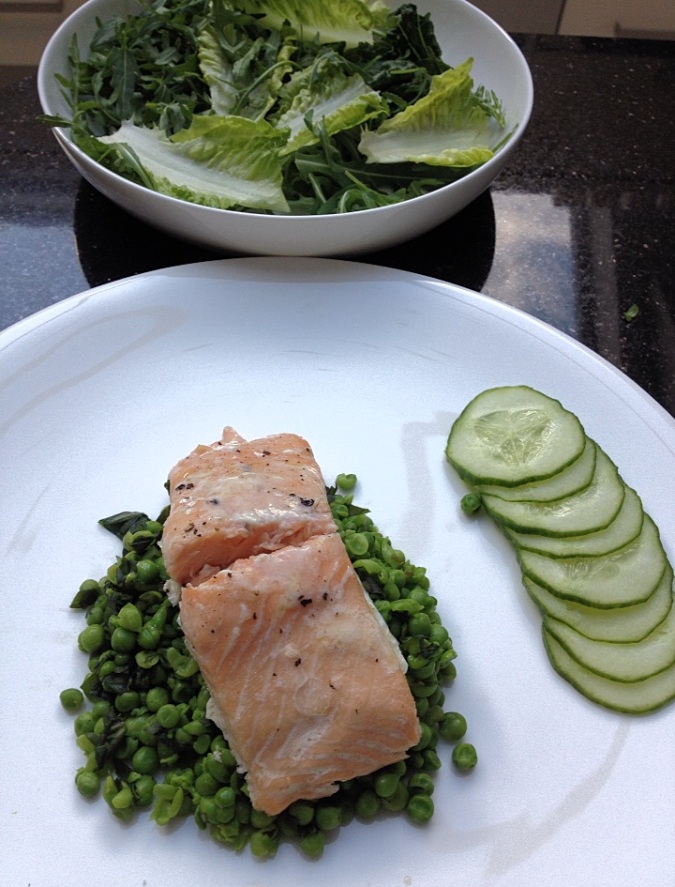
I love the freshness that Basil gives to a meal. I bought this in Lidl for €1.49. It’s now happily sitting on my windowsill for multiple uses during the week. I was wondering what I could put with this as Mr Coeliacpages wasn’t home for dinner and I wanted something quick to cook. So, I opted for Salmon. It’s one of my favourite fish meals. I roast it in the oven at 180 for no more than 10 minutes. I hate salmon that is overcooked and has lost that beautiful softness.
I simply dotted some butter along with salt and pepper before putting into the pre-heated oven.
When the salmon went into the oven I boiled the kettle to pour onto the frozen petite pois. These cook in less than two minutes, so I quickly prepared the salad and a bit of basil to put through the peas that I lightly crushed with a potato masher.
I love a good salad dressing. One of my favourite finds is ‘Mary Berry’s’. It has the right amount of sweetness and pepper for my taste.
This is a dinner that is prepared really quickly and has a nice lightness but yet filling.
Sometimes, food that is naturally gluten free, is as quick to cook as any other convenience food. I had prep, cooking and serving completed in 20 minutes.
Enjoy.
Gluten Free Chicken Biryani
Gluten Free Chicken Biryani is a mildly spiced, rice based dish that can be enjoyed by all of the family. Cooking and preparation time take approximately one hour. I find with this dish that the preparation can take longer than the cooking, but the end result is well worth it. I normally do this dish at a weekend when I have a bit more time to cook. A pestle and Mortar is handy for this recipe to grind your cardamom seeds.
Ingredients
- 300g biryani rice or basmati rice
- 800 ml chicken stock – I use Knorr GF Stock pots.
- 4 skinless chicken breasts- chopped in to bite size pieces
- 5 green cardamom pods
- half teaspoon of turmeric
- one teaspoon of ground cumin
- one teaspoon ground coriander
- half teaspoon cayenne pepper
- 1 cinnamon stick, approximately 5 cm long
- 2 bay leaves
- 25g butter
- 3-4 cloves of garlic
- 1 large onion – I don’t eat onion, and it’s just as good without!
- 1 tablespoon of grated root ginger
- 2 tablespoons of chopped coriander
- 4 tablespoons of flaked almonds – lightly toasted on a pan.
Put your rice into a heatproof bowl, season and cover with boiling water. This speeds up the cooking process later.
Next, you need to prepare your spices. To extract the seeds from the cardamom pods, you can lightly crush them with a knife or the pestle and mortar. Put the seeds into the pestle and mortar and crush them. I then add the rest of the spices in here as well.
Make sure your pan is large enough to cook the whole meal. Melt the butter over a medium heat and add the onion (if using), garlic, ginger and other spices. Careful not to have the heat too high as burnt garlic will ruin the entire dish. Cook this out, until the onion is soft.
Add the chicken pieces and cook until it has turned opaque.
Drain the rice and rinse it under cold water, then stir into the pan. Add your chicken stock and season with salt and pepper.
At this stage it looks very ‘soupy’. Bring it to the boil, cover and reduce the heat. Let it simmer gently until the rice is cooked and liquid is absorbed.
While it’s simmering, gently toast the almonds in another pan. I find this gives a nice crispness and texture to the dish. Also chop your coriander.
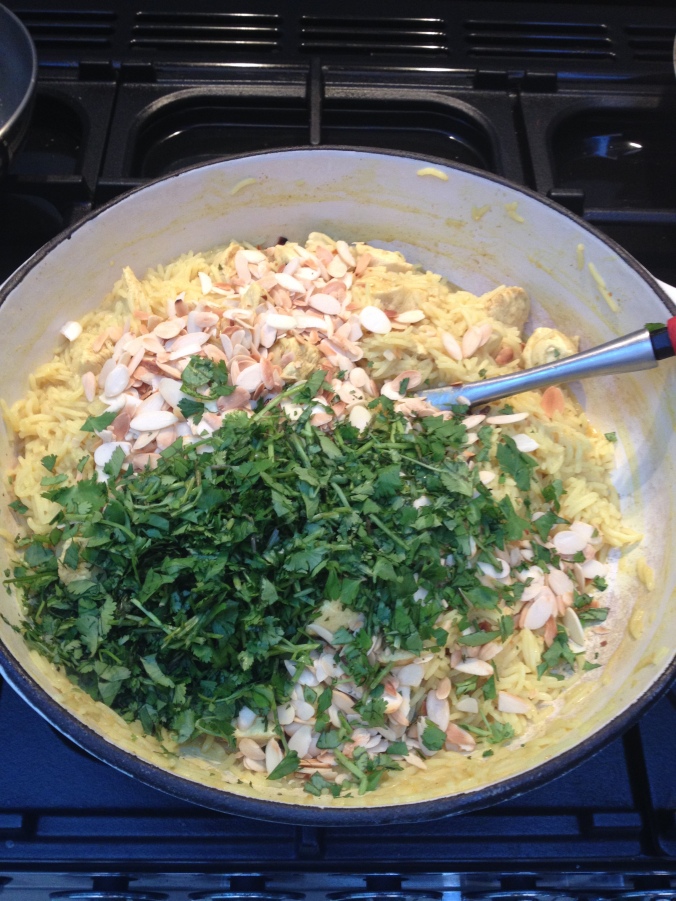
Remove from the heat when the rice is cooked and stir in the almonds and coriander.
When I am serving a rice dish, I always warm the serving bowls, as the rice cools very quickly otherwise.
This dish can be easily upscaled for more people by increasing the rice and stock ratio’s and adding extra chicken. For example 400g of rice would require 1050ml of stock.
Gluten Free Hot Smoked Salmon Fish Cakes
Hot Smoked Salmon is a naturally gluten free product. Always double check the label to ensure that there are no other ingredients added.
I buy hot smoked salmon in either Lidl or Aldi and it makes for an economical, quick mid-week meal. I don’t see the point in spending a large amount of money on the fish when it’s a component of a dish like this. It’s different when you are eating a good smoked salmon as a starter, then the extra money, to me, is worth it sometimes to get the difference in flavour and texture. Especially in Ireland where we have some amazing organic smoked salmon and artisan smoke houses. Another day, another post!
So anyway, on with my quick mid-week fish cake recipe. This is a meal that my kids also enjoy.
Ingredients
- Hot Smoked Salmon – around 250g. I use only one packet between two adults and two smaller kids as I make the kids fishcakes bite size. If more than two adults, then two pack from Aldi/Lidl are necessary.
- 400 g Sweet Potato. Or you can use a mix of sweet and regular.
- 1.5 teaspoons of Smoked Paprika. Some really good authentic Spanish Brands out there in small tins that are marked ‘Sin Gluten’
- 50g Frozen Petit Pois
- Salt and Pepper
- 1 egg – beaten
- Gluten Free Breadcrumbs OR
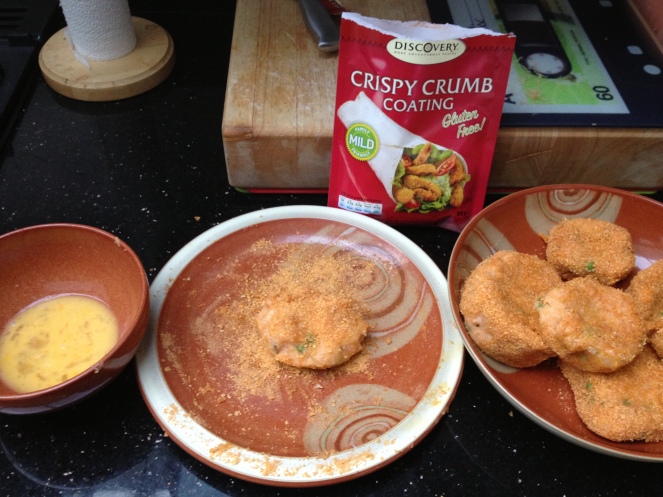
- Discovery Gluten Free Crispy Crumb Coating – I bought this in Dunnes Stores.
I generally just have some side salad with this.
First thing is to peel and chop your potatoes before boiling and mashing them.
Once the potatoes are mashed, add in your hot smoked salmon and mash along with the paprika, salt and pepper. The Smoked Paprika really adds to the flavour of the hot smoked salmon in this dish.
At this stage you can add your frozen peas. I find that they don’t need pre-cooking and cooking them once within the gluten free fish cakes, is plenty.
At this point, I find it easiest to get my hands in to make the fish cakes into the size that you like.
Once you have shaped your fish cakes, dip them in egg and then your Discovery gluten free crumb mixture or your gluten free bread crumbs and they are ready for frying, or if you prefer, you can oven bake them.
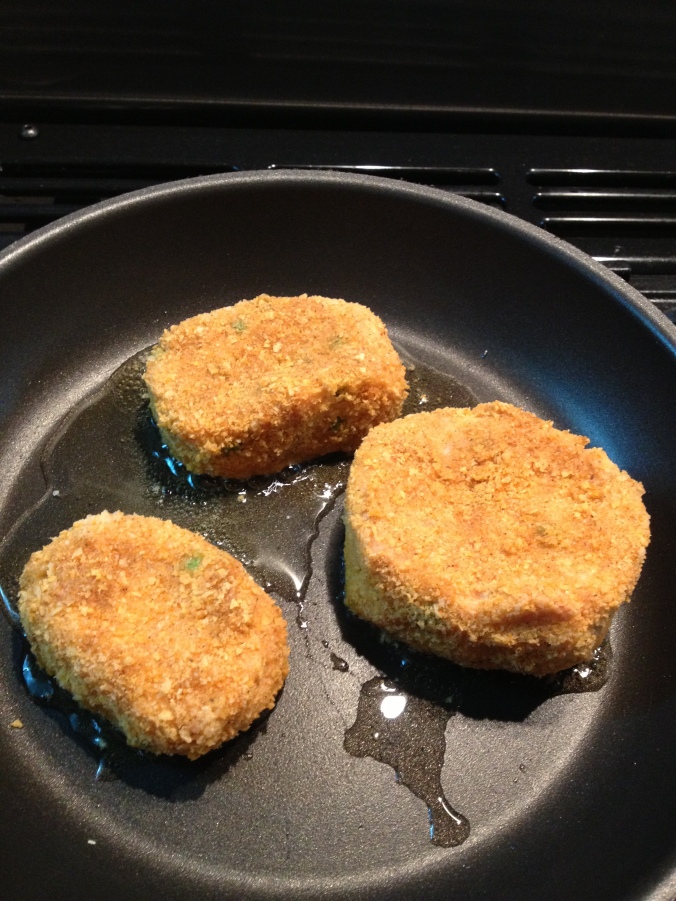
On this Occasion I fried mine in a little oil in a non-stick pan. This part takes under ten minutes. Cook until warmed through and crispy on the outside.
As they have potato and fish in them, I find that a side salad is plenty to make a filling gluten free dinner.
I hope that you find this recipe as convenient as I do as a quick mid-week gluten free dinner. Feel free to leave your comments or to contact me and let me know how you get on.
Gluten Free Chicken Wings
I didn’t used to be a huge fan of chicken wings. It wasn’t something that I would have eaten growing up. However, after I moved to Dublin and prior to my coeliac diagnosis, I tried the quite famous chicken wings from Elephant and Castle. After that, I was amazed that they had stayed off my food radar for so long. I still visit the restaurant, not for wings though as last time that I asked they aren’t gluten free. They can cater for coeliacs and they have a pretty impressive mexican salad.
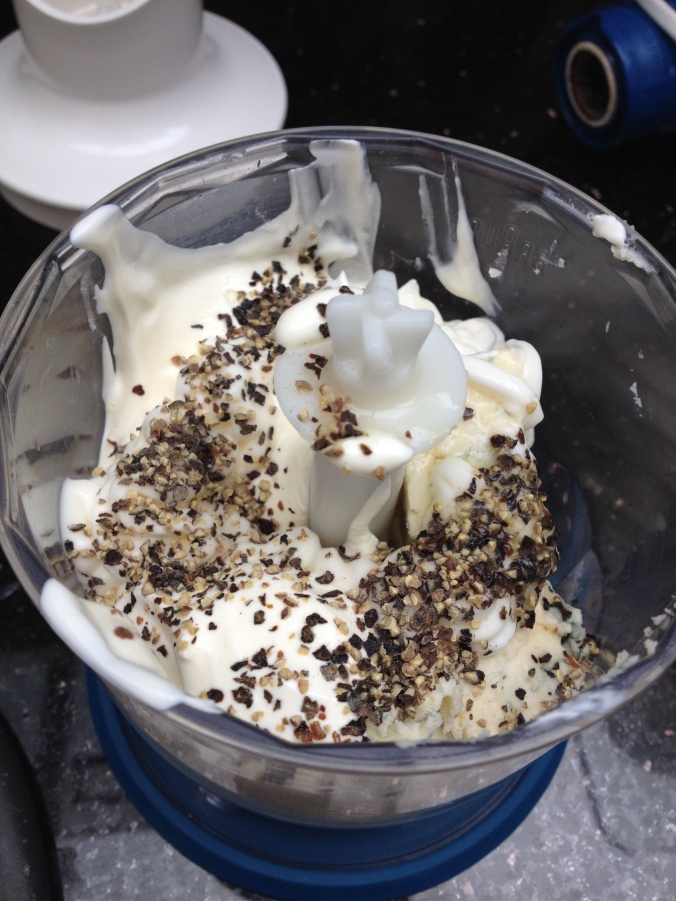
In my quest to replicate the Elephant and Castle wings, I make a blue cheese dip to go with these. I don’t normally eat blue cheese but I find Cashel Blue has a beautiful mild creaminess that I really enjoy. To make the dip, add about half the packet with a good tablespoon of creme fraiche, a good tablespoon of gluten free mayonnaise, a clove of garlic, ground black pepper and a squeeze of lemon juice if you have it. Blitz all these ingredients together.
This dip is best made before the wings go into the oven so that it can infuse and let the flavours develop.
The wings are pretty straightforward to prepare and also economical. You can buy a pack of 10-12 full wings in Dunnes for £2.99. I used to get their free range wings, however I’ve been having trouble finding them recently. I split the wings before I bake them in the oven. By this, I mean that I cut the tip off the top and then split the wing in two. You should feel a natural place to cut in the middle of the wing, in between the cartilage. I find it easier to eat them when they are cooked like this.
As you can see from the picture, I had a couple of hungry guests that night as well!
I light sprinkle of olive oil and some sea salt is all I use prior to cooking them. I put them into a very hot oven, around 210 C Fan Oven. These normally take between 50 minutes to 1 hour to cook. I prefer mine when the skin has gone crispy. Personally I hate a soggy wing that when you bite in it feels like the skin has a layer of fat. Hence, I cook them until the fat has rendered off them and they are crispy. I turn them at least once during cooking.
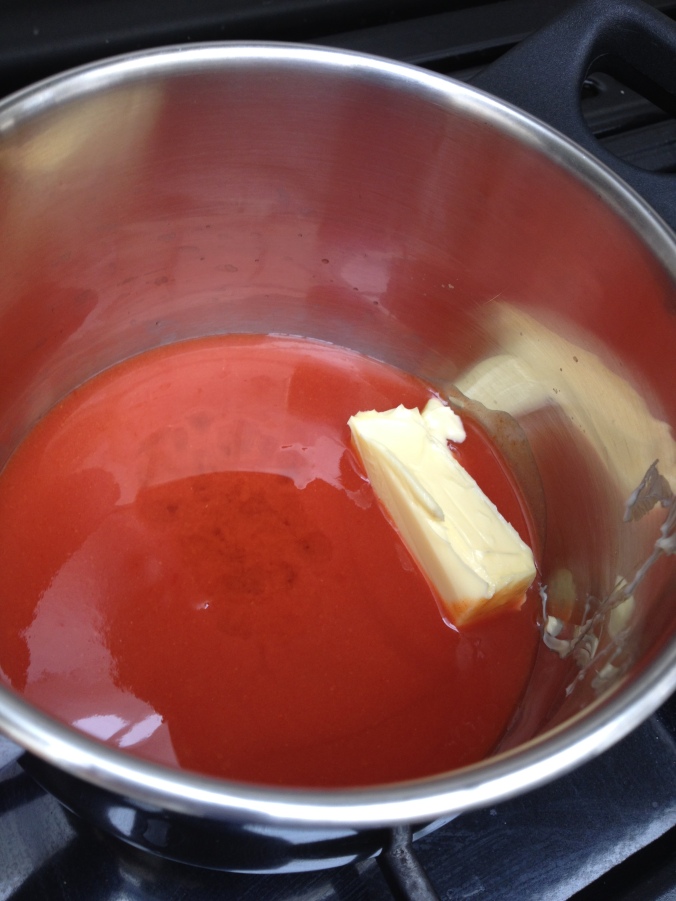
While they are cooking, you can prepare your sauce and celery. I used Franks Hot Sauce which is gluten free, as stated on their website
Put as much sauce as you need to cover the wings into a pan. To this I add a dessert spoon of white wine vinegar and a knob of butter and heat gently.
So, once your wings are crispy, put them into a serving dish and pour over your sauce.
This is a great weekend recipe or a Friday night meal with a glass of crisp New Zealand Sauvignon, or a Gluten Free Beer!
Gluten Free Beef Chilli Casserole
Gluten Free Beef Chilli Casserole is a really good recipe to have around. It’s one that I easily scale up if we’re having a get together at home. It’s convenient as it can be cooked the day before, in fact it’s even better if you do and also, there aren’t too many ingredients. It can also be easily adapted into a gluten free chilli con carne recipe, just add some gluten free cumin and some kidney beans. I brown the meat in a heavy cast iron casserole dish and let it slow cook on the hob for a minimum of three hours.
Ingredients
800g Stewing Beef – This is the size I buy from my butcher. Below ingredients are based on this quantity
Red Chilli to taste – I usually put 2-3 minimum, including seeds.
1 Onion – I exclude this and it still tastes brilliant.
1 Red Pepper
2 x 400ml Tins of Tomatoes
Tomato Concentrate
3-4 cloves of garlic
2 Bay Leaves
1 Rich Beef Knorr Stock Pot – Gluten Free
Cut your stewing beef into bite size pieces.
Brown the meat over a very high heat with a little oil, until it has turned that beautiful caramel colour. Make sure you sear and don’t stew the meat at this stage so divide into a couple of batches if necessary for browning. When the meat has browned, add in the pepper, garlic, onion and chilli’s. I always taste a small piece of raw chilli before deciding how much to add to the casserole, it’s the only way that I can judge the heat. Cook for a few minutes, stirring regularly.
Add in your tomato concentrate as this needs to cook out for a few minutes. Following which, add in your tins of tomatoes and refill one of these to at least halfway with water and add this to the casserole. Add the bay leaves, seasoning and also a pinch of sugar. When cooking with tinned tomatoes the sugar cuts through the tartness. Bring to a gentle boil and reduce the heat to very low and simmer for at least three hours. Make sure that you stir it occasionally to prevent it from catching on the pan.
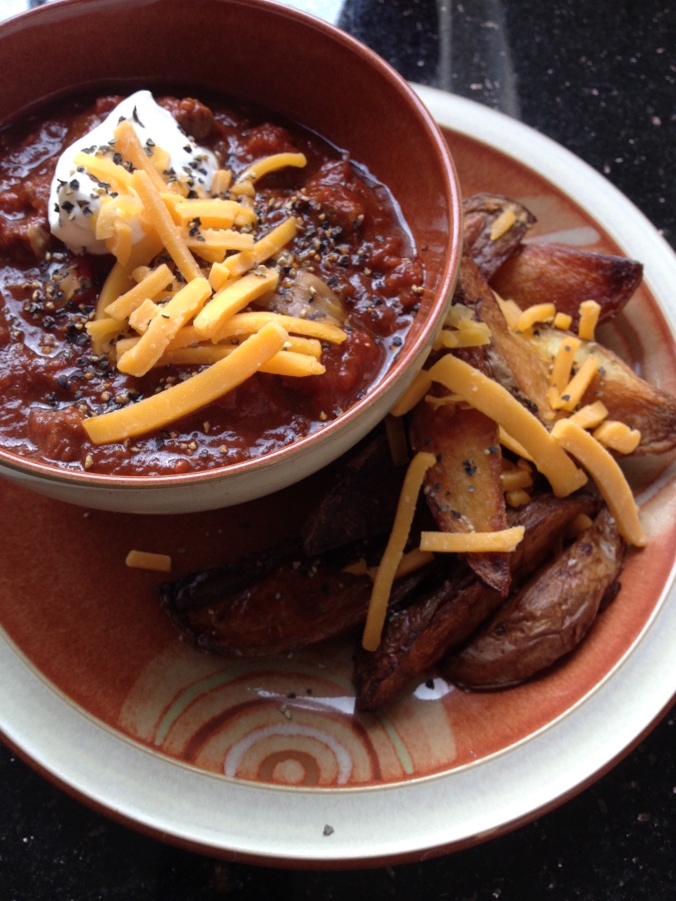
This can be served with a number of side dishes. For example, baked potato, sweet potato chips, or potato wedges. Then there are the usual accompaniments such as soured cream, grated cheese or guacamole.
This will easily store in the fridge for a few days and can be enjoyed as leftovers. I had mine later in the week again and ate it with re-heated left over potato wedges. I always cook enough so that I can have a night off cooking.
Let me know what you think!
Pavlova Recipe – Naturally Gluten Free
I love, love, love Pavlova and Meringues. I love them because they are light to eat, naturally gluten free and with a small bit of effort, relatively simple to make. I use it as a regular dessert for both family and guests as it can be an impressive way to finish a good meal.
The pavlova recipe and the meringue recipe have very little difference. A pavlova is meant to have a soft mallow middle, whereas the meringue is supposedly crispier. This is achieved with a small tweak between sugars. For my pavlova, I use four egg whites. I’ll do a separate page for the meringue recipe. The pavlova recipe doesn’t have to be used to make one large one, and is rather nice when divided into mini individual pavlovas. I would make a large batch of mini pavlovas when there are a larger number of people at a gathering. I never refrigerate eggs and always have them at room temperature, this is personal choice. If you do refrigerate your eggs, get them to room temperature before embarking on these recipes!
Pavlova Ingredients
4 Large Egg Whites
250 g Caster Sugar
1 teaspoon Cornflour – Gluten Free with no cross-contamination
1 teaspoon White Wine Vinegar
1 teaspoon Vanilla Extract
Baking Sheet, lined with parchment or greaseproof.
I always separate my egg whites into a different bowl before adding them to the mixing bowl. This way, if you accidentally get some yolk into your white, the whole mixture doesn’t have to be wasted. Once you have your egg whites in a large mixing bowl, use an electric whisk to beat them until they look dry and can hold a peak.
When they have reached this stage, start whisking your sugar in, one tablespoon at a time. This gives the sugar a chance to dissolve. The mixture should start to turn glossy. A few tablespoons before the end of your sugar, mix your gluten free cornflour, vinegar and vanilla extract into a paste.
Add this mix to your egg whites and add the remaining sugar. This cornflour mix is your secret weapon in creating the soft marshmallow inside of the perfect pavlova!
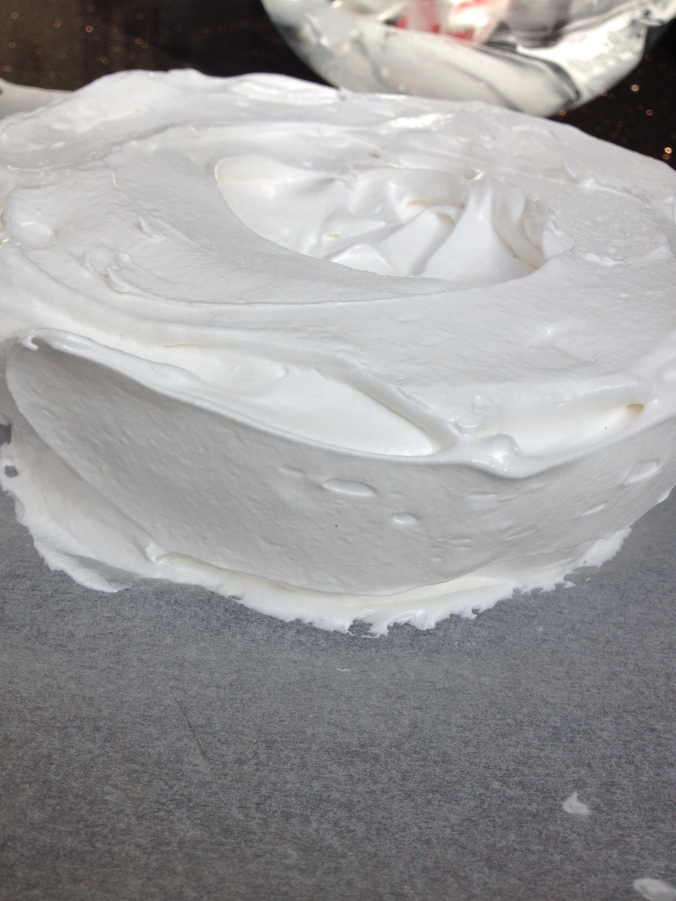
Spoon the egg white mix onto your prepared baking sheet and shape into your pavlova, working quickly and gently. Try to avoid air pockets when spooning onto the baking sheet. Leave a small dip in the middle where the cream will go once before serving.
Or if you’re doing mini pavlovas, a tablespoon of egg mixture is enough for each one. Again, leave a small dip in the middle.
Have the oven heated to 170 degrees and once your pavlova goes in, reduce the heat immediately to 130 for a fan oven or 150 regular. Bake for one hour after which, turn the oven off and leave the pavlova in the oven until completely cold. Top Tip – a small dab of the meringue mix under the parchment sheet on the baking tray, keeps it all in place.
Gently remove your pavlova from the baking sheet and put straight onto your serving plate to decorate. I only decorate immediately prior to serving as the cream causes the pavlova to weep if left for too long.
Enjoy, and as always, let me know how you get on.
Meringue – Naturally Gluten Free Dessert
Meringues are a great finish to a meal and even more impressive when you’ve made them yourself. Unlike the pavlova recipe, meringues are just eggs and sugar. They can be shaped into nests if you have a piping bag. Don’t let this put you off though, I just spooned them onto the baking sheet and dabbed a small peak with the spoon.
Ingredients
4 large egg whites
125g caster sugar
125g Icing sugar
You’ll also need an electric mixer, hand or worktop as well as a sieve.
Preheat the oven to 100 degrees centigrade. Line a baking tray with parchment paper.
Like the pavlova, separate your egg whites into a bowl and mix until they look dry and have soft peaks.
Now add the 115g of caster sugar, one spoonful at a time while continuously beating the egg white mixture. The mixture should be thick and glossy now.
Sieve one third of the icing sugar at a time, over the mix and gently fold in with a large metal spoon, until all the icing sugar has gone.
Use one dessert spoon to lift the mixture out and another to push it onto the baking tray.
Bake for a minimum of 90 minutes in a fan oven. The meringues should feel light and crisp to touch and have a very light caramel colour.
I serve my meringues sandwiched together with whipped cream and strawberries.
Enjoy your baking. Let me know how you get on.

