Coeliac Awareness Week 12-19 May 2014

For Coeliac Awareness Week, I’ve decided to share my story of diagnosis and my road to discovery of being coeilac.  I have to say, I really hate the word disease and I don’t think of myself as living with a disease. I’m happy and healthy with a generally positive attitude.    I think I’ll struggle in part to share some detail, but I will do so anyway, in the hope that if anyone feels resonance with what I say and it provides comfort knowing they aren’t alone, that’s a positive outcome.

I’ve been thinking of this post for a few days since a twitter chat with the lovely Gluten Free Photographer and I suggested that some bloggers should share their story of diagnosis.  This was also done last year, but I didn’t contribute as I only started my blog in the past couple of months.

This is a good starting point for me – Gluten Dude is a US based blog and also worth a read.  He created this really helpful image.


Coeliac Awareness Week - Symptoms.


I didn’t realise I was coeliac for almost the first 30 years of my life.  I guess this isn’t unusual as many GPs weren’t aware of Coeliac Disease back in the 1970s and 1980s.  However, looking back,  I displayed many symptoms that when considered together, actually scream:  ‘STEP AWAY FROM THE GLUTEN!’  I remember having constant mouth ulcers, canker sores, poor teeth enamel with consequent fillings.  I also remember a lot of stomach pain, vomiting at times, nausea and plenty of diarrhoea.  I guess one of the big things for me was the late onset of puberty.  While this isn’t in the above diagram, it is another symptom of being coeliac.  I didn’t hit puberty until I was 17 which in itself caused other issues of low self esteem and feeling different and isolated from my peers in school.

After a happy few years in Uni where I consumed enough gluten on the obligatory student diet of pasta, toasties and the odd beer, I sailed through those years with no obvious impact on my body.  After a couple of years in work, I undertook a  part time post-grad course while still working full time.  To say this was a stressful and busy time is an understatement.  I thought that it was the stress was causing my health issues.  It reached crisis point when I could no longer hold any food or nutrients.  I was experiencing diarrhoea up to fifteen times per day and even though I had rapid weight loss, my tummy was always bloated.  I’d been put on stomach ulcer medication which didn’t help and then three courses of antibiotics for the gut rot.  I was then put on a very restrictive diet where I had to cut out caffeine, yeast, gluten, starch and live on a small number of very limited plain foods.  It was here that I started to heal again and feel back to my old self.  As I had a six week holiday to  Australia planned, I remained on a gluten free diet as I noticed repercussions when I ate it.  Let’s face it, who wants to be sick when on a holiday of a lifetime?  This meant that there was to be a four month gap between me last consuming gluten and getting a scope test in the hospital.  I had never been told that to test for coeliac, you still need gluten in your diet.  I couldn’t have kept eating gluten, physically I’d become skeletal and ill.  So, my result came back negative.  I’m not alone in this occurrence and many coeliacs are still not aware that they need to consume gluten until they are tested and indeed many have become so ill the mere thoughts of this is too much while waiting possible months for a scope test.

One of the biggest realisations for me on seeing the above chart, was the female specific area as I’d gone through many of the symptoms.  Unfortunately, on my first pregnancy I had an early stage miscarriage.  I have since had two sons but on my second son, I was threatening miscarriage and had a long two week wait to see that little heart beat.  I didn’t know until last week about the connection between coeliacs and miscarriages.  That’s not to say that because I’m coeliac, I had a miscarriage.  Not enough is known about either to comment.  I do know that I’m really blessed and grateful for two happy, healthy little men.  I guess it struck a chord seeing it on the chart as one of the most often mentioned symptoms in the test group.

During the course of the next few years  I also realised that I couldn’t eat gluten free oats.   A few years ago I had a lot of pain, nausea and bloating again.  My GP sent me for a gall bladder scan as it was thought that I had gall stones, the pain was so bad.  I had a scan and was told my gall bladder was fine.  That in itself was good news but no answer to the pain.  I cut out gluten free oats for breakfast and again, my health was restored.  I get an immediate severe reaction if I eat any gluten free oats now.

I don’t want my coeliac journey to be considered a tale of woe.  Yes, there have been obstacles along the way.  On the whole, I’m a really positive person.  At the moment I have my health.  I eat extremely well as I eat very little processed food.  I cook from scratch and I’m becoming better all the time at that.  I’ve discovered a real passion for good food and we’re blessed in Ireland to have access to so many wonderful products  both naturally gluten free and artisan produced gluten free foods.  I don’t think of myself as having a disease and I am certainly not defined by being coeliac.  It’s part of who I am.  I hit the gym three to four times per week and in the past six months I’ve started interval training.  I’m fitter now than a decade ago.

I’m the only coeliac in my house, so far.  I’ve had to get one of my sons tested as he started displaying some symptoms.  His test was negative, but I’ll be on the lookout for further signs.  I guess my husband might as well be coeliac as he lives like one at home as all the food that I cook for dinners are naturally gluten free.  It became difficult for us to find venues to eat out in and that’s why I started my directory of gluten free restaurants and food venues in Ireland.  I don’t think that as  a coeliac you should miss out on these experiences and he was missing out as well.  That was my motivation to start http://www.coeliacpages.ie  There are new and exciting  times on the horizon for coeliacpages. I really just want to make life as a coeliac as straightforward as possible for all.

Thanks for reading my post for #coeliacawarenessweek

facebooktwittergoogle_pluspinterestlinkedin

Prawn Pil Pil – Naturally Gluten Free

View image on Twitter

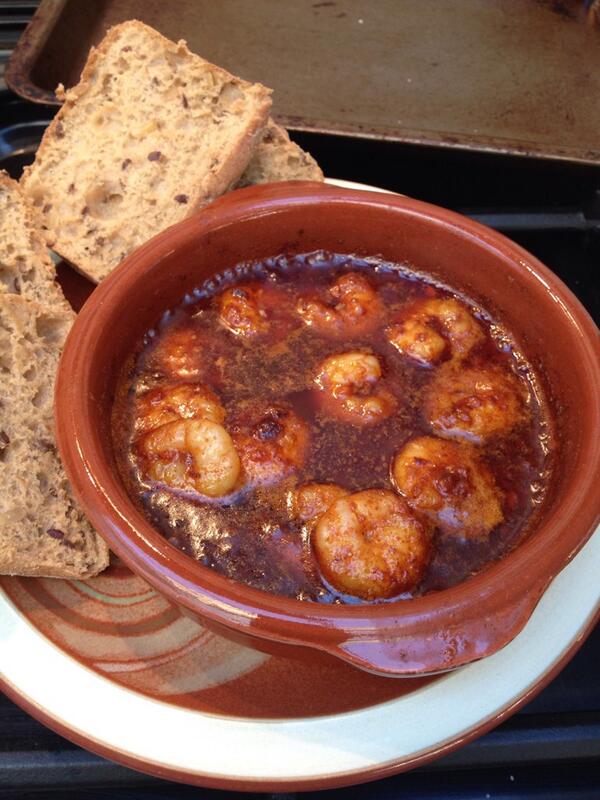
I got a great reaction to the Prawn Pil Pil dish that I cooked last weekend when I tweeted about it and put a photo up on my Facebook page.   I just love the taste of smoked paprika, it’s definitely up there as one of my favourites.

The inspiration for this dish came from a recent trip to Spain.  While there, we visited Pinoccio’s Bar  who have a vast array of gluten free tapas and dishes available.  They are very knowledgeable about coeliac disease and cross contamination.  I’ve eaten here a few times and never had a negative reaction.  So, this year I tried their Prawn Pil Pil with gluten free bread to mop up the sauce.  I loved it so much, I had to recreate this recipe.

When I was in Spain, I bought a few Tapas ceramic dishes in the market as you can pick them up for €1.00.   This is definitely a dish that I think should be made in individual dishes, no issues with double dippers!  Just make sure that whatever dish you use, is oven proof and small enough for one serving.

Ingredients

Olive Oil – Not Extra Virgin as it would be too overpowering.

One clove of garlic finely chopped per serving – at least.  Add more if you like.

One Teaspoon of Smoked Paprika per serving – I stock up with Authentic Gluten Free Version when in Spain.  The tins can be sourced in Ireland or online.

Sprinkle of Dried Chilli Flakes (to personal taste) per serving.

Sprinkle of Salt Flakes

I used a 200g bag of frozen, precooked prawns for two servings and they worked a treat.  Just defrost them overnight in the fridge. Don’t leave them outside of the fridge as Prawns can go off quite quickly.  Obviously, fresh prawns would work equally as well.

On this occasion I used a couple DS Gluten Free Ciabatta.  I wanted the crusty exterior with soft bread so that I could tear and dip into the sauce.  (I’m actually getting hungry writing this)  These need baked in the oven, but I have often done this straight from the freezer.

Method

Pre-heat your oven to around 170 degrees Centigrade (this was a fan oven).

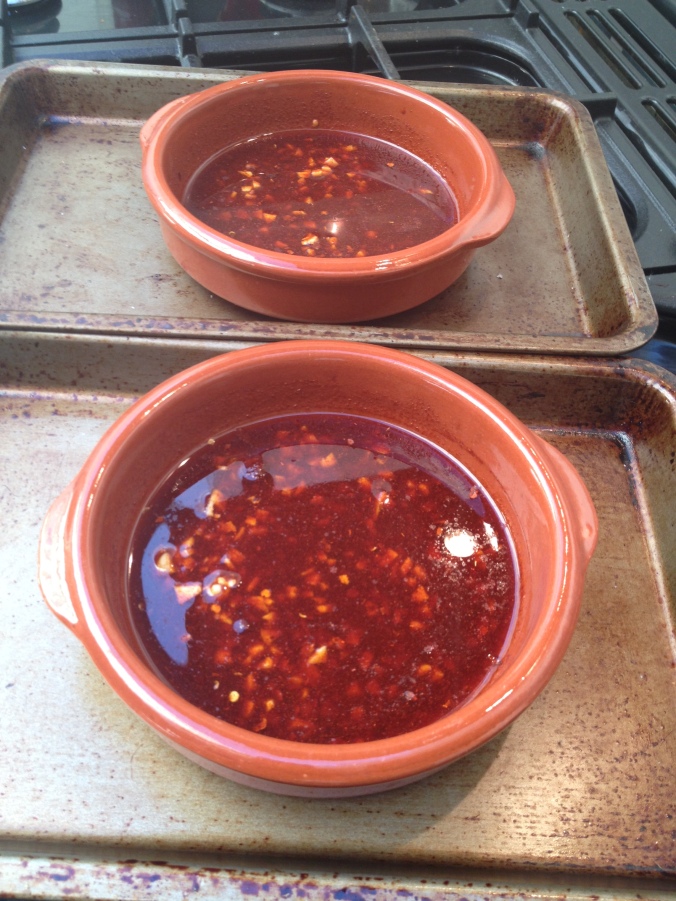
Cover the bottom of the dish with Olive Oil.  This is another reason that you don’t want a massive individual dish as too much oil would ruin it.  Add in your garlic, smoked paprika, chilli flakes and salt.  Give a quick stir with a teaspoon.  Put the dish on an oven tray and heat for about 20 minutes.

Gluten Free Prawn Pil Pil


The oil should be bubbling when you take it out of the oven.  Check for seasoning and add more salt if required.  The Paprika should not taste powdery, it should have cooked into the oil and have a smooth texture.  If it still tastes powdery at this stage, put back in the oven for another five minutes.

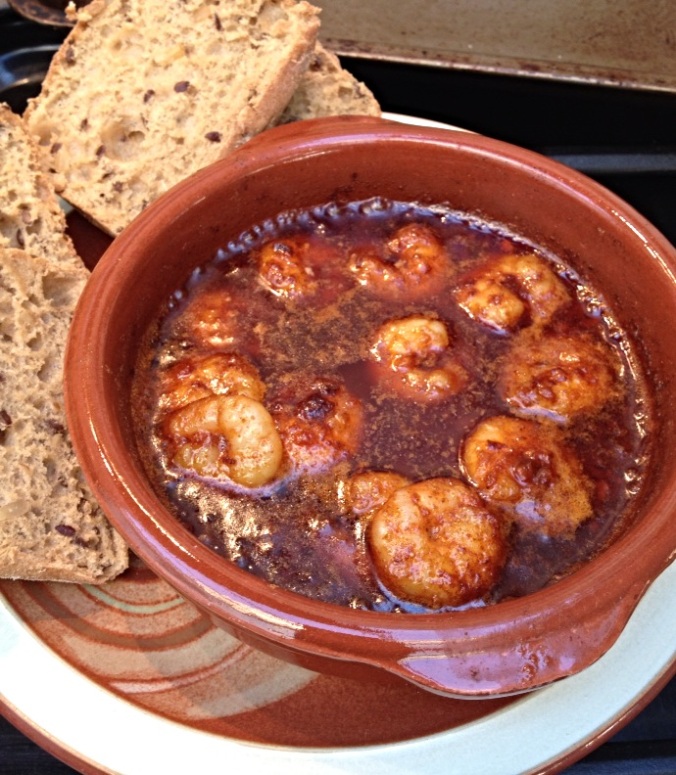
When you take the flavoured oil out of oven, add the prawns and return to the oven until the prawns are heated/cooked and the oil is sizzling again.

That’s it….so simple yet absoultely amazing flavours.

Serve this with your bread and enjoy.

Gluten Free Prawn Pil Pil


facebooktwittergoogle_pluspinterestlinkedin

Gluten Free Caramel Shortbread

Ingredients for the base                 Ingredients for Filling     

75g Rice Flour                                    397g tin Condensed Milk

100g Cornflour                                    150g Soft Dark Brown Sugar

125g Butter                                          150g Butter

55g Sugar

Oil or butter for greasing a 20cm tin.

For the Topping

250g of Chocolate broken into pieces.  Personally, I love Dark Chocolate and the contrast with the sweet caramel works a treat!  A mix of Milk and White chocolate also works well.

Method

Preheat your oven to 180 degrees Centigrade or equivalent.  Grease and line a 20cm tin with baking parchment.  For the base, cream your sugar and butter together, either by hand or by using an electric mixer.  Add in the flour and blend together.  Press into the tin and prick with a fork then bake for fifteen minutes or until lightly golden.  It will still feel a bit soft to touch. 

While the base is cooking, prepare your caramel.  Place all the ingredients for the filling in a non-stick saucepan and stir until the sugar is dissolved.  Be careful not to boil this and just try to get a gentle simmer going while continually stirring it.  It should just start to change colour and have a slightly firmer consistency.  This may take 15 minutes  but keep stirring.  Careful though, this mixture is really hot so if kids are making these or helping, make sure an adult supervises this stage.  Spread the caramel onto the cooled shortbread.

When the caramel has cooled, melt the chocolate for the topping.  I melt the chocolate in the microwave in short bursts of 20 seconds and checking each time, this is important as there is nothing worse than wasting all that gorgeous chocolate by nuking it in the microwave.  If you’re more comfortable melting it in a bowl over a saucepan of gently simmering water, just make sure the base of the bowl isn’t touching the water. 

Spread the chocolate on top and leave them to set.  This is like a gluten free Twix bar.  I love these with a coffee, a real treat for adults and kids alike.  My kids love them even though they aren’t coeliac.  They also help with the cleaning up by licking the bowls, sure you have to as a kid!!  Once they are set, cut into approximately 16, or whatever suits you.  Enjoy.

facebooktwittergoogle_pluspinterestlinkedin

GLUTEN FREE FISH FINGERS

This is a useful recipe as it’s very inclusive for coeliac kids, they don’t like to feel left out or that they have to eat special food.  I do my best to cook family meals that just happen to be gluten free.

For the Fish Fingers, you can use a fillet of white fish or even salmon.  I find Cod or hake work well.  I cut the fillet into similar size pieces of a regular fish finger.   From a 250g Fillet, I can get 4  good size fish fingers.  A fishmonger will skin and pin bone fish for you.

As I cook the fish in the oven, I serve them with home-made wedges.

I power boil some potato wedges(leaving skins on) until softened, drain, toss in olive oil and put onto a hot oven tray.  These normally take 45-55 minutes, depending on size.  Season to taste.

Ingredients:-

250g Fillet will serve 2 small kids or one adult.

Couple of generous tablespoons of gluten free flour, I use Doves white flour mix.

A beaten Egg

2-3 slices or of gluten free bread made into breadcrumbs or you can now buy gluten free crumbs.

I oven bake these as it’s healthier than deep frying.

Method:-

Heat your oven to 190 degrees Centigrade for  fan oven.  When the potatoes are in, prepare the fish

Cut your fillet into whatever size you want your fish fingers to be.  Cut the opposite way that your fish will flake, otherwise they will disintegrate when cooked.

Dip each finger into the flour, followed by egg, then roll in the breadcrumbs.  If doing a few you can bulk the egg out with some milk.

I put them onto non-stick tin foil and give them a spray from the fry light cooking oil, gives them a crunchy coating and helps cooking process.  They will cook in under 8-10 minutes, just keep an eye on them.  If you have them made early, pop them in the fridge as this helps the coating stick.

I serve the wedges and fish fingers with some steamed vegetables, or the kids favourites, beans!

Getting the kids involved in dipping the fish, often encourages them to eat them when cooked

facebooktwittergoogle_pluspinterestlinkedin

Gluten Free Chicken, Chorizo and Prawn Jambalaya

Ingredients:-

Olive Oil

1 Chopped Onion

Garlic clove

2-3 Sticks of Celery

1 Red Pepper

2 Chicken Breasts

1 Chorizo

200g Prawns

2 teaspoons of smoked paprika (I use the authentic Spanish one from the tin)

2 Bay Leaves

600 ml of Double Strength Chicken Stock

2 teaspoons of Tomato Puree

160g Long Grain Rice

Spring Onions

I’ve tried this dish with risotto rice and basmati rice and long grain, easy cook long grain is the best.  The risotto rice goes too sticky and the basmati takes too long to cook and the additional cooking time dries out the chicken.

Pre-heat your oven to 180 Centigrade for a Fan Oven.  Heat the olive oil and add the chopped celery, onion and garlic to the pan and cook until soft and starting to brown.  Add the Chicken, Paprika and bay Leaf, reduce the heat a little so the chicken can get sealed but without the paprika burning.  Once the chicken has changed colour, add the chorizo, tomato puree, rice and stock.  Stir and season, not too much salt as the chorizo and stock have salt.  Add pepper to taste, but make sure that you don’t overdo it if you are using the hot smoked paprika.  Once the mix starts bubbling, transfer your pot to the oven.  When the stock is almost absorbed (check after 15-18 mins), add the prawns and spring onions and cook for less than five minutes.  The rice should be cooked through and the stock absorbed, but not dry.

I serve this with a simple salad.

facebooktwittergoogle_pluspinterestlinkedin

Gluten Free Thai Sweet Potato Soup

2-3 Sticks of Celery

2 Onions

Half Red Chilli

1.5 -2 cm of Grated Ginger

2 Garlic Cloves

15ml Sunflower oil

4 medium Sweet Potato (approx 600g)

1 litre of Gluten Free Chicken or Vegetable Stock

200 ml of Coconut Milk

Coriander

This  Gluten Free Thai Sweet Potato Soup is really quick and easy; a real winter warmer for these cold days!

Chop the celery, Onion, Chilli and Garlic.  Small but rough is fine as the soup gets blitzed at the end!  Fry all these along with the ginger in the oil, until they start to soften a bit.  While that is in the pan, peel and chop the sweet potato.  When the Celery has softened, add the potato and stock.  Cook until soft and then blend.  I use a hand blender in the saucepan as I find this most convenient, you can add to a liquidiser if that is easier for you.  Add the coconut milk and some chopped coriander.  If you don’t have fresh coriander, use the tubes that you get in the fridges of supermarkets, very handy to have around!  Re-heat the soup after you add the coconut milk and enjoy!  This is one of my favourite gluten free soups!

facebooktwittergoogle_pluspinterestlinkedin

Gluten Free Chocolate Cake

This is a flourless Chocolate Cake that is amazingly moist.

Ingredients :-

Cake

165g Butter

180g Dark Chocolate – Use at least 70%. I use over 80% if I can get it to give a more intense chocolate flavour.

6 Eggs, Separated

130g Caster Sugar

130 g Ground Almonds

Frosting

150g Butter

90g Icing Sugar

80g Dark Chocolate


Method:

Preheat the oven to 170 Degrees Centigrade.  Line a 25cm Springform Cake Tin with greaseproof paper.

Melt the butter and chocolate very gently on a low heat. Don’t let it boil.  Take it off the heat and allow to cool a little before using.

Whisk the Egg Yolks until they are doubled in size and slowly add half the sugar while whisking.  Once the mix is light and foamy, add the cooled butter and chocolate mix and fold in with a spatula or metal spoon.

Put the egg whites in a large bowl and whisk until they are turning opaque then while continuing to whisk, add the remaining caster sugar.  I do this until they are quite full, but not like meringue.

Fold the egg whites into the chocolate mix then gently stir in the ground almonds.

Transfer the mixture to the tin and bake for 30-40 minutes.  The cake should feel firm but still a bit gooey or soft in the middle, otherwise it will dry out.

Take the cake out of the oven and allow to cool completely in the tin.  The cake normally drops a bit in the middle when cooled.  This is perfect as it means that it isn’t too dry.  You can fill the dip in with the frosting anyway.

Frosting

I always think that frosting isn’t an exact science so tinker with the recipe until you get a butter cream that suits you.

I usually melt chocolate in the microwave for this, doing it in 20-30 second intervals and stirring between each one.  Once melted, allow to cool a  little.

Beat the icing sugar and butter together until they are well combined, lightened in colour and fluffy texture.  Add the cooled melted chocolate and mix well.

Add the frosting to the top and sides of your cake and it’s ready to serve.

I got this recipe from Lorraine Pascales book “Home Cooking Made Easy” and I’ve adapted the frosting a bit as I thought the original recipe had too much butter! All personal taste I guess.

facebooktwittergoogle_pluspinterestlinkedin